In Our last blog of Learning Android we learnt about :
**- **What is Android
**- **Android Internal Architecture
So, After knowing much detail about android platform , you are now get excited to know somehow about :
-
History of Android platform
-
Android versions available in market
-
How Android Can be Installed
-
How Android Application can be designed, developed and Run
-
How you can deploy your apps on android market world.
We are now move to staring our next lecture of Android Learning (Android Learning Part-2)
History of Android Platform with Android Versions available in market
Android is a bunch of software’s comprising operating system and also work as middleware,key applications.
-
Android Inc was founded in Palo Alto of California, U.S. by Andy Rubin, Rich miner, Nick sears and Chris White in October 2003.
-
Later on Android Inc. was bought by Google in 2005. On Date November 5, 2007 Google officiely announces Development of Android OS.
-
Let’s We discuss now Android Version Available from officiely announcement.
Android V1.0 (API Level -1)
- In September 2008, Google Lanuches Android Version 1.0 (T-Mobile G1)
- This was the first Android Smartphone as HTC Dream.
Android V1.5 (API Level-3)
- In April 2009 , Google Lanuches Android Version 1.5 (CupCake)
- Bluetooth A2DP and AVRCP support
- Uploading videos to Youtube and photos to Picasa.
Android V1.6 (API Level-3)
- In September 2009 , Google Lanuches Android Version 1.6 (Donut)
- WVGA screen revolution support
- Google free turn by turn support.
Android V2.0/2.1 (API Level-6/7)
- In October 2009 , Google Lanuches Android Version 2.0/2.1 (Eclair)
- HTML5 Support
- Bluetooth 2.1
- Microsoft Exchange server.
Android V2.2 (API Level-8)
- In May 2010 , Google Lanuches Android Version 2.2 (Froyo)
- USB tethering and Wi-Fi hotspot functionality
- Adobe Flash 10.1 support.
Android V2.3 (API Level-9)
- In December 2010 , Google Lanuches Android Version 2.3 (Gingerbird)
- Multitouch Software Keyboard
- Support for Extra Large Screen Sizes and Resolution
Android V3.0 (API Level-11)
- In May 2011 , Google Lanuches Android Version 3.0 (Honeycomb)
- Optimized tablet support with a new user interface
- 3D Desktop
- Video chat and Gtalk support
Android V3.1 (API Level-12)
- In May 2011 , Google Lanuches Android Version 3.0 (Honeycomb)
- Connectivity for USB accessories (USB On-The-Go).
- Expanded Recent Applications list
- Resizable Home screen widgets
- Support for external keyboards and pointing devices
- Support for joysticks and gamepads
- Support for FLAC audio playback[70][71]
- High-performance Wi-Fi lock, maintaining high-performance Wi-Fi connections when device screen is off
- Support for HTTP proxy for each connected Wi-Fi access point
Android V3.2 (API Level-13)
- In September 2011 , Google Lanuches Android Version 3.0 (Honeycomb)
- Improved hardware support, including optimizations for a wider range of tablets
- Increased ability of applications to access files on the SD card, e.g. for synchronization
- Compatibility display mode for applications that have not been optimized for tablet screen resolutions
- New display support functions, giving developers more control over display appearance on different Android devices
Android V4.0.1 -v4.0.2 (API Level-14)
- In October 2011 , Google Lanuches Android Version 4.0.1 (Ice Cream Sandwich)
- Soft buttons from Android 3.x are now available for use on phones
- Separation of widgets in a new tab, listed in a similar manner to applications
- Easier-to-create folders, with a drag-and-drop style
- Improved visual voicemail with the ability to speed up or slow down voicemail messages
- Pinch-to-zoom functionality in the calendar
- Integrated screenshot capture (accomplished by holding down the Power and Volume-Down buttons)
- Improved error correction on the keyboard
- Ability to access applications directly from lock screen
- Improved copy and paste functionality
- Better voice integration and continuous, real-time speech to text dictation
- Face Unlock, a feature that allows users to unlock handsets using facial recognition software
- Automatic syncing of browser with users’ Chrome bookmarks
- Data Usage section in settings that lets users set warnings when they approach a certain usage limit, and disable data use when the limit is exceeded
- Ability to shut down applications from the recent apps list with a swipe.[83]
- Improved camera application with zero shutter lag, time lapse settings, panorama mode, and the ability to zoom while recording
- Built-in photo editor
- New gallery layout, organized by location and person
- Refreshed “People” application with social network integration, status updates and hi-res images
- Android Beam, a near-field communication feature allowing the rapid short-range exchange of web bookmarks, contact info, directions, YouTube videos and other data.
Android V4.0.3 -v4.0.4 (API Level-15)
- In December 2011 , Google Lanuches Android Version 4.0.3 (Ice Cream Sandwich)
- Numerous bug fixes and optimizations
- Improvements to graphics, databases, spell-checking and Bluetooth functionality
- New APIs for developers, including a social stream API in the Contacts provider
- Calendar provider enhancements
- New camera applications enhancing video stabilization and QVGA resolution
Android V4.1 (API Level-16)
-
In June 2012 , Google Lanuches Android Version 4.1 (Jelly Bean)
- Smoother user interface:
- Vsync timing across all drawing and animation done by the Android framework, including application rendering, touch events, screen composition and display refresh Triple buffering in the graphics pipeline
- Enhanced accessibility
- Bi-directional text and other language support
- User-installable keyboard maps
- Expandable notifications
- Ability to turn off notifications on an application-specific basis
- Shortcuts and widgets can automatically be re-arranged or re-sized to allow new items to fit on home screens
- Bluetooth data transfer for Android Beam
- Tablets with smaller screens now use an expanded version of the interface layout and home screen used by phones.[94]
- Improved camera application
Android V4.2 (API Level-17)
-
In October 2012 , Google Lanuches Android Version 4.2 (Jelly Bean)
- Lock screen improvements, including widget support and the ability to swipe directly to camera
- Notification power controls (“Quick Settings”)
- “Daydream” screensavers, showing information when idle or docked
- Multiple user accounts (tablets only)
- Rewritten Bluetooth stack, switching from Bluez to Broadcom open source BlueDroid,[106] allowing improved support for multiple displays and wireless display (Miracast)
- Native right-to-left, always-on VPN and application verification.[107] A new NFC stack was added at the same time.[106]
- Accessibility improvements: triple-tap to magnify the entire screen, pan and zoom with two fingers. Speech output and Gesture Mode navigation for blind users
Android V4.3 (API Level-18)
-
In July 2013 , Google Lanuches Android Version 4.3 (Jelly Bean)
- Bluetooth Audio/Video Remote Control Profile (AVRCP) 1.3 support
- OpenGL ES 3.0 support, allowing for improved game graphics[116]
- Restricted access mode for new user profiles[116]
- Filesystem write performance improvement by running fstrim command while device is idle[117]
- Dial pad auto-complete in the Phone application[116]
- Improvements to Photo Sphere[118]
- Reworked camera UI, previously introduced on Google Play edition phones
Android V4.4 (API Level-19)
-
In September 2013 , Google Lanuches Android Version 4.4 (Kitkat)
- Refreshed interface with white elements instead of blue
- Clock no longer shows bold hours, all digits are thin. The H, M, and S markings for the stopwatch and timer have been removed, leaving just the numbers.
- Ability for applications to trigger translucency in the navigation and status bars[131]
- Ability for applications to use “immersive mode” to keep the navigation and status bars hidden while maintaining user interaction
- Action overflow menu buttons are always visible, even on devices with a “Menu” key, which was officially deprecated by Android 4.0.
How Android can be Installed
- Before Android Installation, we first need to know about system specification on which android can be work and what are the system requirement for successful android installation.
In Concern of System Platform where Android Platform can be that you can start your Android application development on either of the following operating systems:
-
Microsoft Windows XP or later version.
-
Mac OS X 10.5.8 or later version with Intel chip.
-
Linux including GNU C Library 2.7 or later.
So Now as we got the Operating System here , where we can install the Android Platform, We must need to know about Minimum System Requirement Also:
- 32-bit and 64-bit ARM, MIPS, x86, x86-64 Processior
- 512 MB of RAM
Now after getting knowledge of hardware and operating system for android installation , we now move to steps for installation.
- At First , we check if our system structure have JDK (Java Development Kit) Already installed or not, if not then we have to first download it.
A Question can comes in your mind , why we need JDK here to install?
So dear my answer is here for your common question
- if you check our first lecture regarding android learning you got Android applications are developed using Java. So As a result, the Java Development Kit (JDK) is the first component and that must be installed.
Please check our first lecture for android learning , if you are not aware of this :
http://maddyzone.com/mobile/android-learning-lecture-1
Android Installation for Development Requires Standard Edition of the Java Platform Development Kit version 6 or higher.
** **How to Setup Java SDK
Step-1 (Downloading Java SDK)
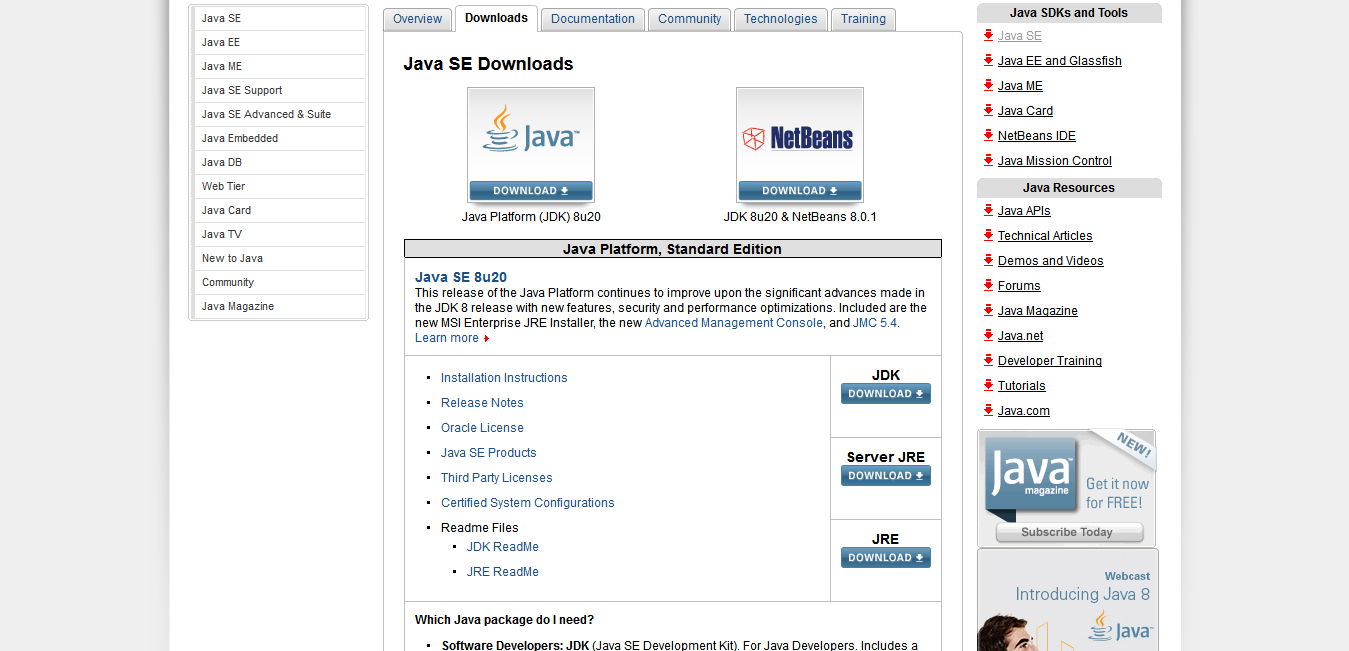
To Download JDK , Please check below link :
http://www.oracle.com/technetwork/java/javase/downloads/index.html
- As you open the link , you will see page looks like as shown in snapshot below :
-
Here you got JDK , Server JRE , JRE from among three option, you have to only choose JDK link to download.
-
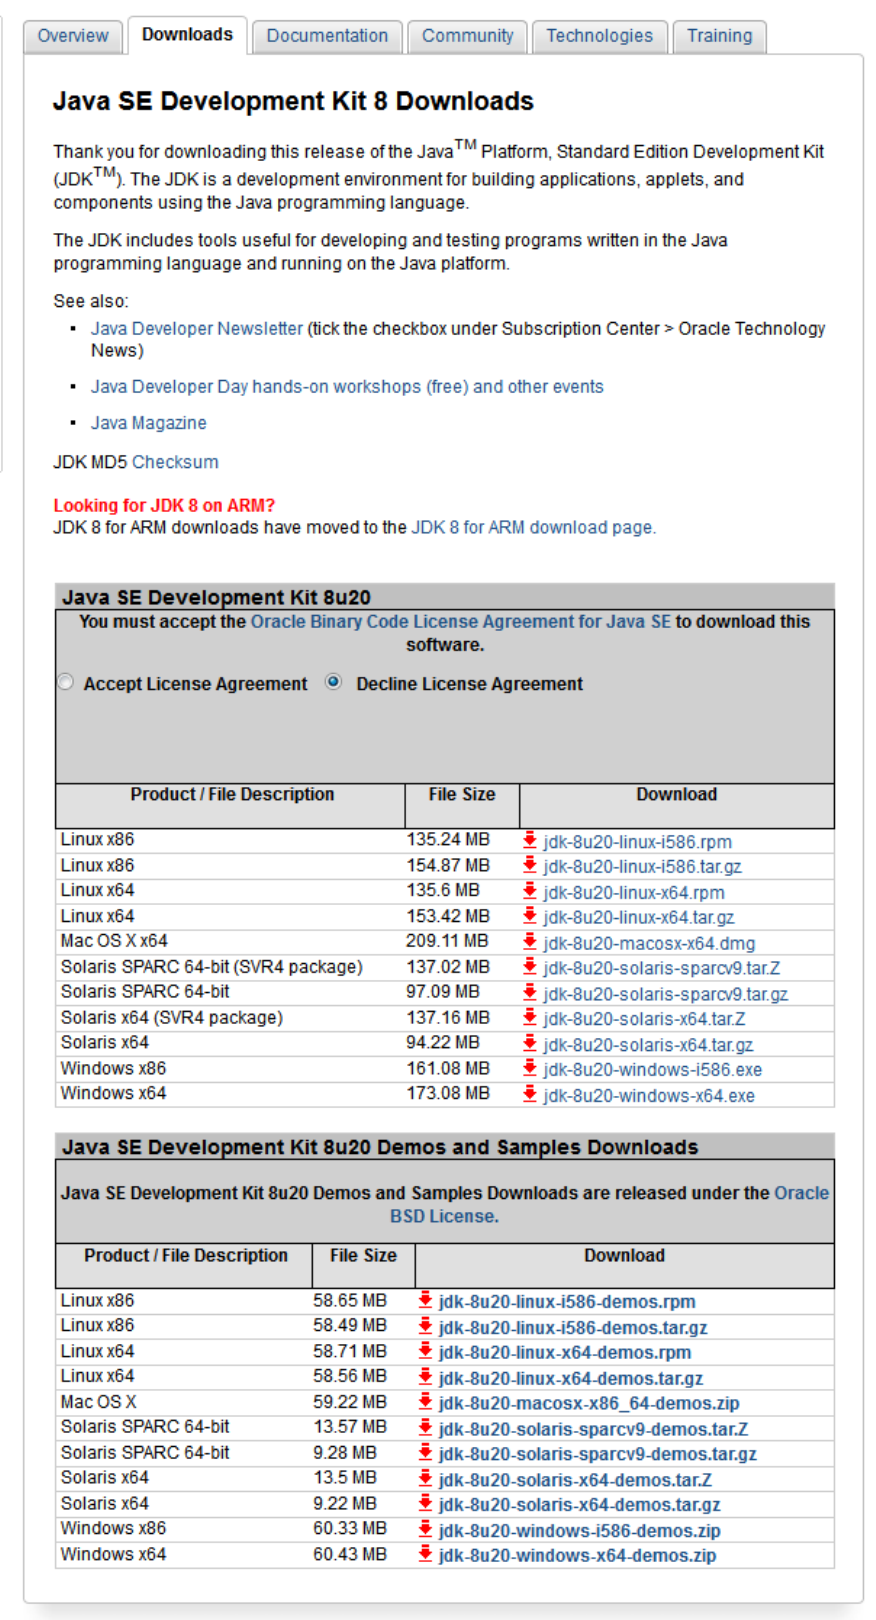
Once you click on download you will move to below link :
http://www.oracle.com/technetwork/java/javase/downloads/jdk8-downloads-2133151.html
- As you can check it is same as shown in snapshot below :
-
Here you got lots of options of JDK version for different-different platform like : Linux , Mac OS , Windows.
-
Now we are only considering here for Windows JDK installation, so you have to check option for windows version either Windows x86 or Windows x64 as per your system configuration,after selecting “ Accept License Agreement “ option.
-
Once you download complete JDK to your system downloads folder than launch the installation executable and follow the on screen instructions to complete the installation process.
Step-2 (Installing Java SDK)
As you start the installation first screen will show you the welcome message to installation wizard and guide you to complete installation as below snapshot

When you click on next button from here , you will move to next screen shown as below :
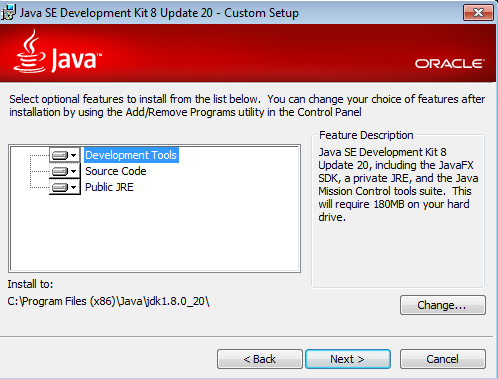
Here you can choose the mode of installation and where do you want to install Java SDK in your system (way to choose location) by default development tools are selected as option , and you can move to next screen by clicking next button directly or by changing location path of installation.
As you click on next button you will move to next screen shown as below :
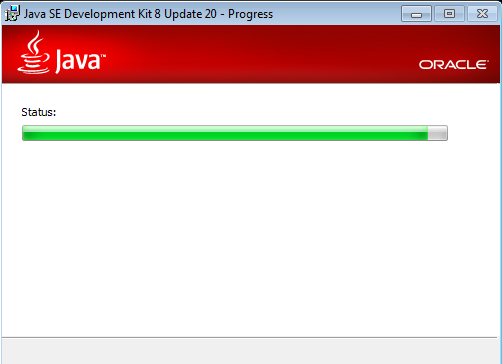
Here you can see the progress of installation, as progress bar reached to completion point , next sreen will popup looks like below :
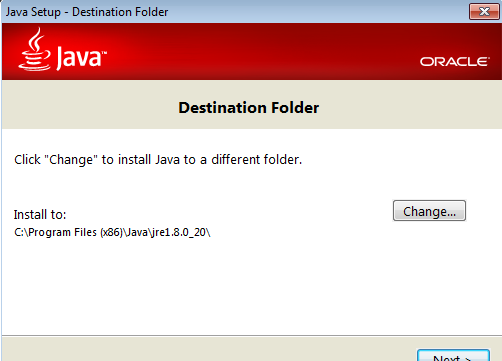
On this screen , you can change the destination folder for installation , otherwise click to next button for complete installation of Java SDK as shown below :
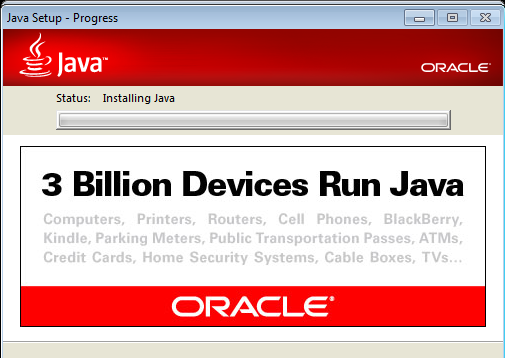
After Successful completion of progress bar on this stage , you will move to next screen showing with message like “Java SE Development Kit version number successfully installed” looks in screen below :
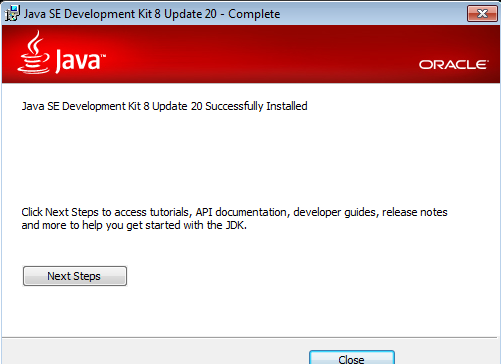
As we successfully complete Java SDK we now move to our next step of Android Installation by name “How to Setup Android SDK”.
How to Setup Android SDK
-
Before going to move to Android SDK installation steps , we have to first know what is Android SDK for?
-
So in this concern, Android SDK provides API libraries and developer tools necessary to build, test, and debug apps for Android.
-
Now Android SDK installation so much easier as ADT Bundle is available which includes the required Android SDK components and a version of the Eclipse IDE with built-in ADT (Android Developer Tools).
-
So Start our step by step process to Android SDK Installation from here.
Step-1 (Downloading Android SDK with Eclipse ADT)
- First We download the ADT Bundle mention from the below url :
https://developer.android.com/sdk/index.html
- After hitting this url you will get the webpage looks like below snapshot

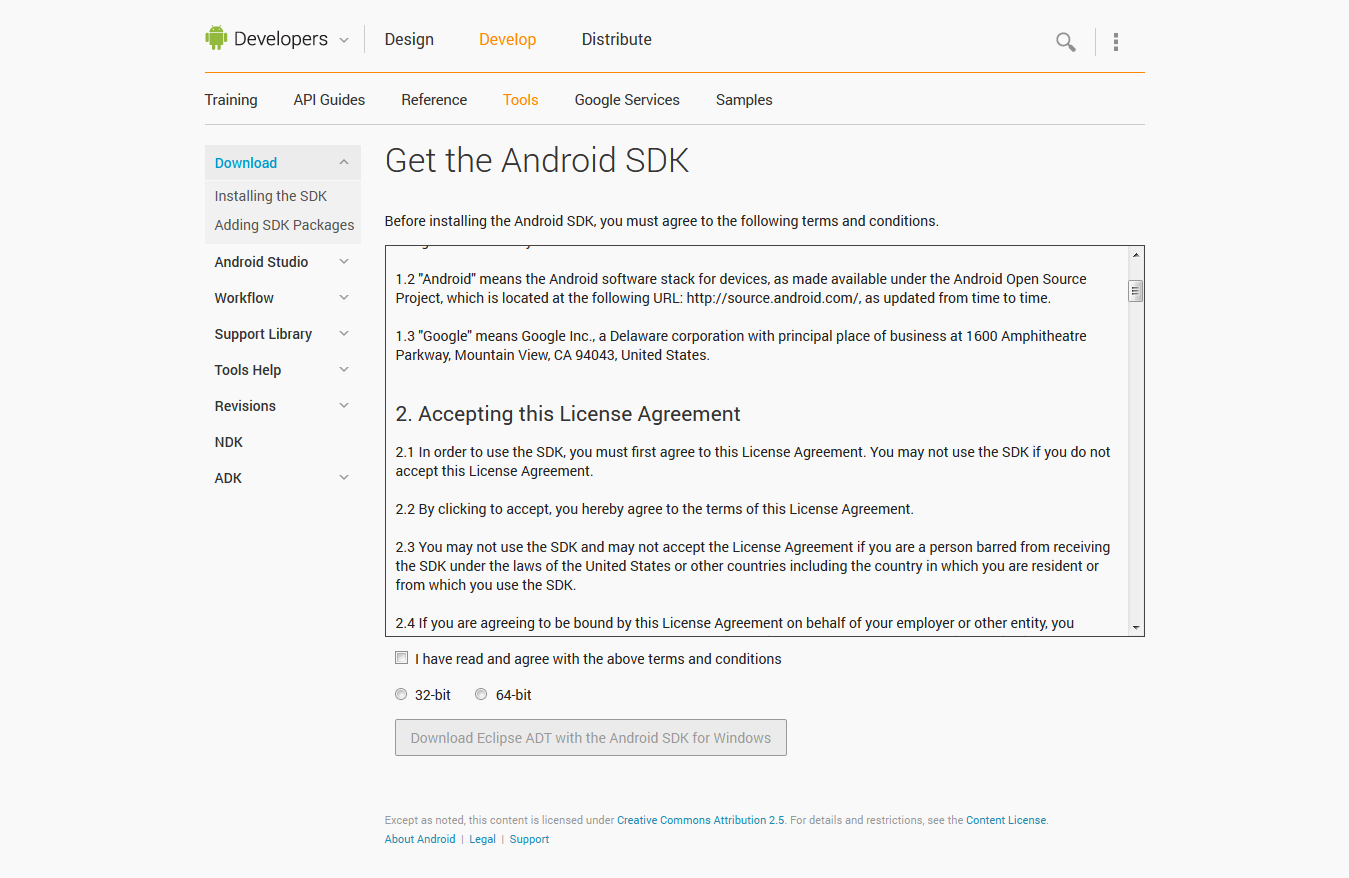
- You can see here a button to download the Android SDK with Eclipse IDE by name “Download Eclipse ADT with the Android SDK for Windows”, while click on this you will get a screen look below.
-
On this screen you have to check the checkbox for mention terms and condition to agree with, and than choose one of the option for your window version like 32 bit or 64 bit.
-
After made these selection you are able to click on button shown below on this page by name “Download Eclipse ADT with the Android SDK for Windows”.
-
Once click on this button downloading start and save the zip file to specific directory of your system drives , where you want to save or in drive d:
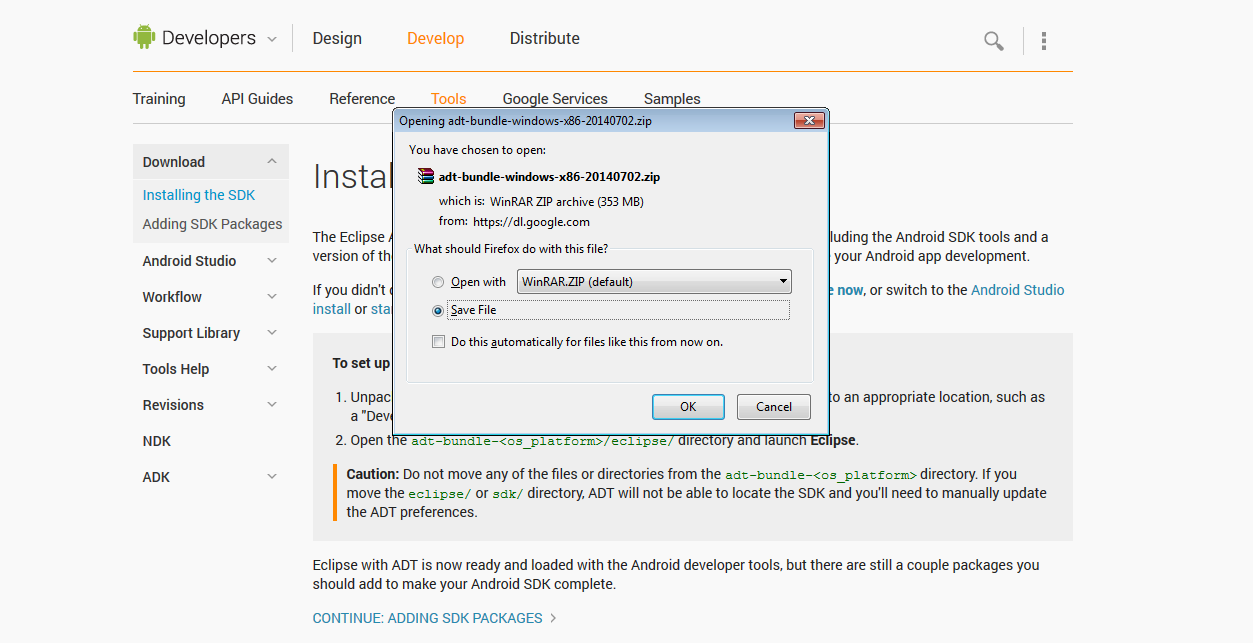
- When downloading is successful or file successfully downloaded to sepecific directory, now unzip the zip bundle and move to our next step “Installing the Eclipse ADT Bundle with the Android SDK”.
Step-2 (Installing Android SDK with Eclipse ADT)
- Bundle have both Android SDK and Eclipse IDE.
To set up the Eclipse ADT Bundle with the Android SDK:
1.) Unpack the ZIP file by name like adt-bundle-
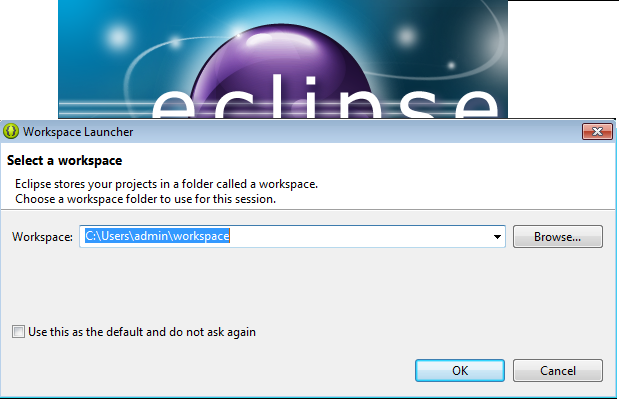
- When you launch Eclipse , you will see the screen looks in snapshot below to create workspace(a folder name where your android apps code will placed what you will develop later on of this blog) on your system.
-
You can change the location of workspace, by browsing particular location, you want to save your develop apps in future.
-
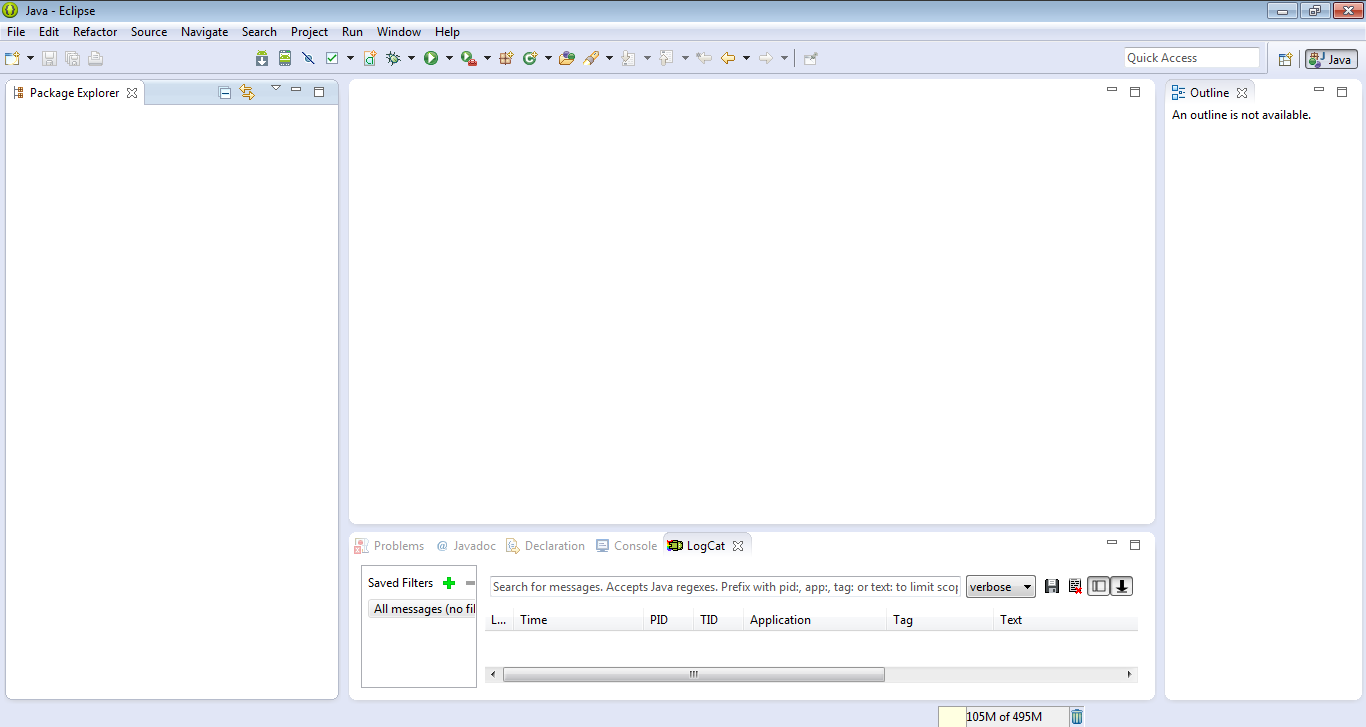
After Clicking on “OK” button , you will get screen looks like below in snapshot
-
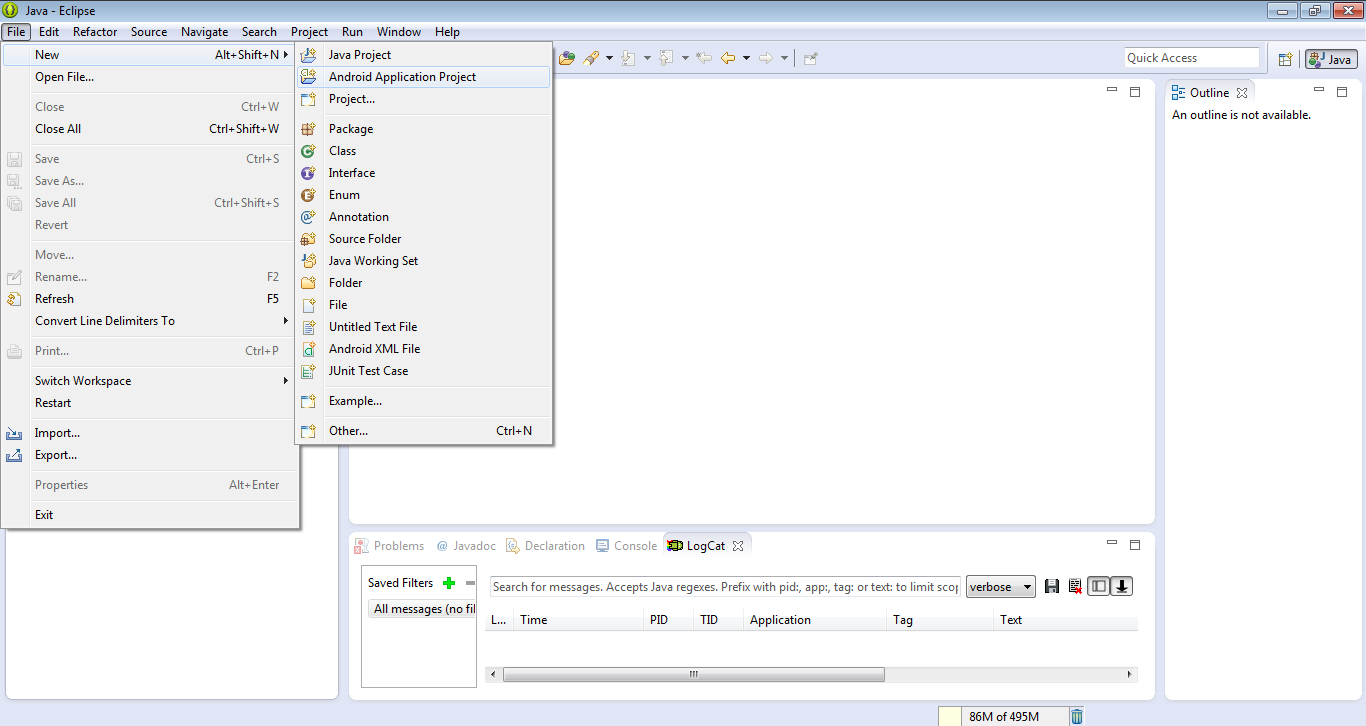
Eclipse IDE provides you way to create Android application by choosing the following option from file menu from Eclipse IDE as :
Go to File Menu -> New -> Android Application Project
Please check below snapshot
- After choosing option “Android Application Project” you will get a screen looks like below:

- Here you can put your application name, you want to create and choose :
1.) Minimum Required SDK from dropdown (Android SDK Version for which you want to create apps) 2.) Target SDK from dropdown (Android SDK Target Version for which your apps will run only) 3.) Compile With from dropdown (Android SDK Version by which your apps will complile for publish) 4.) Themes from dropdown (Choose theme for your apps to display on mobile device by default)
-
As you can check in snapshot all above four options are blank, and need to fill by default to create apps.
-
You can done by downloading and adding SDK Packages.
-
So here we move to our next step for android installation.
Step-3 (Downloading and Adding SDK Packages)
-
To Download or Adding SDK Packages we have to follow below process.
-
Go to Windows menu of the Eclipse IDE than choose Android SDK Manager option like:
Windows -> Android SDK Manager
See the snapshot below :
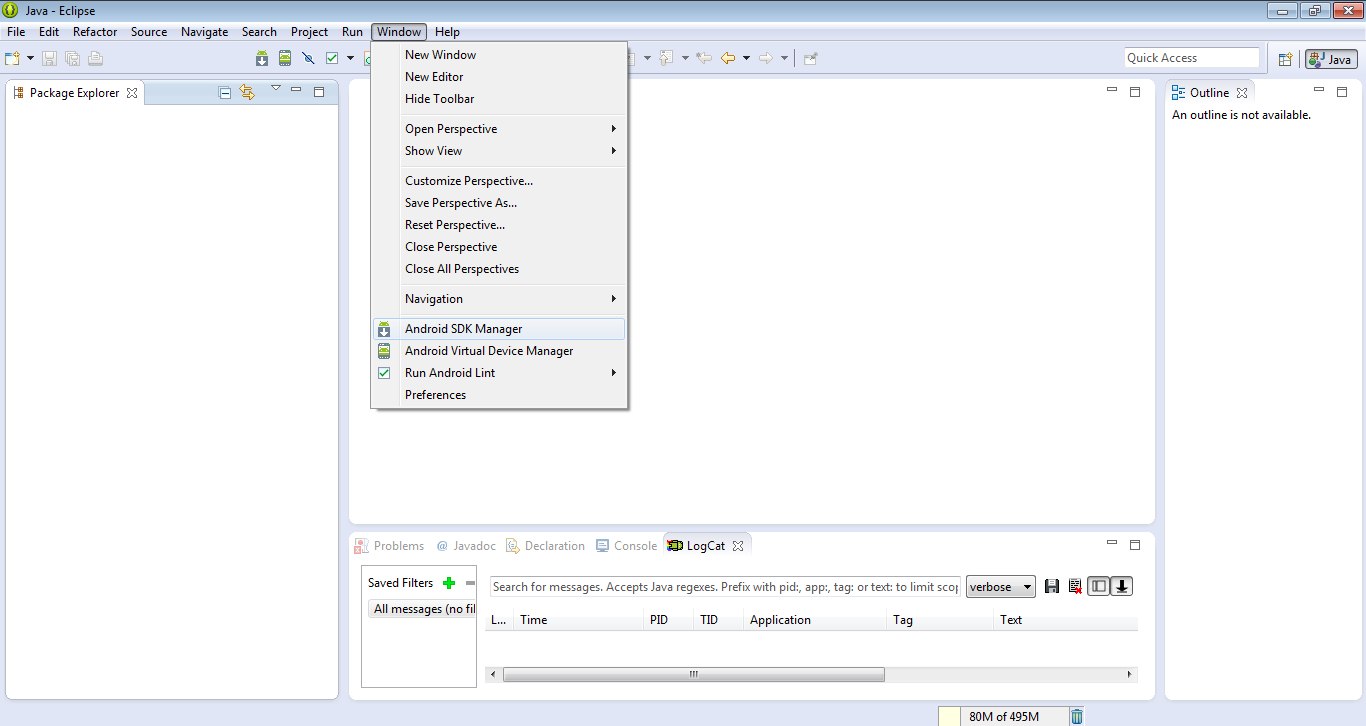
- Once you click on Android SDK Manager a screen will popup showing all the packages for android to install with respect to Android Vesions available with this bundle.
See the snapshot below :
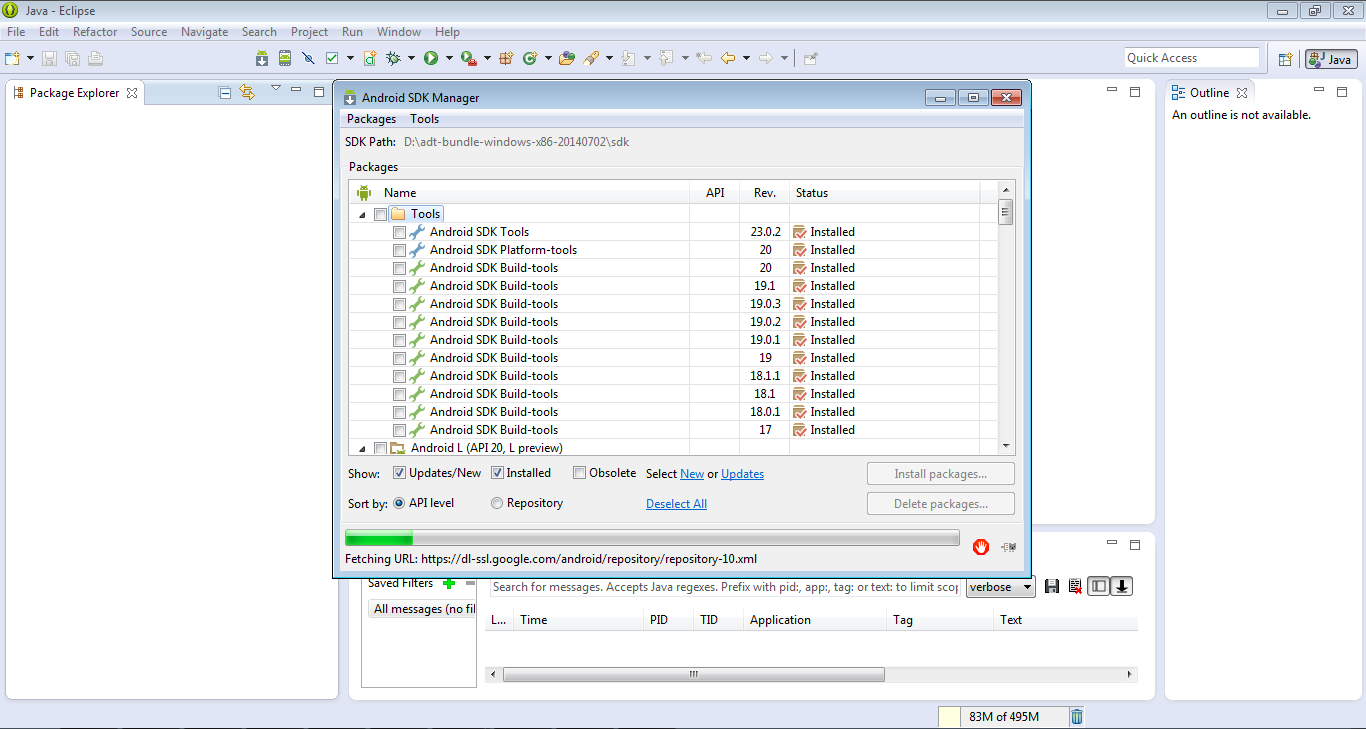
- You have to choose required package or if you want to install all packages select all and click on Install Packages button.

- Here you can choose packages to install by accepting the agreement license as shown in below snapshot.

-
After Accepting the Agreement downloading of selected packages will start and time depends on the number of packages you choose for installation or its took about 3-4 hrs. minimum for installation.
-
After complete successful package downloading , you are now get excited to know somehow about :
-
How Android Application can be designed, developed and Run. ?
-
How you can deploy your apps on android market world.?
So dear for all these questions and your eagerness to learn , know more about world most popular mobile platform Android and Development of apps using Android Platform , we will move to our next lecture , in which we will learn about all the above questions.
If you like please this post, please like us on social media, if you want to know more about in this topic please comment us and suggest us. We will come in our next lecture of android learning by considering your valuable feedback in our mind.
reference http://en.wikipedia.org/wiki/Android_version_history