From last 2 Year i am Using Go Daddy Hosting but now i am making a site using Node.js **but in my Hosting plan Node.js is not available and if i use Hosting with Node.js in Go Daddy then it **is too costly So i have decided to use Amazon Web Services(AWS).So here i am sharing my experience that how i Setup Node.js On Amazon EC2.In this post basically i will describe that How to setup and host website with Amazon EC2.
First make Account in Amazon Web Services (AWS)
_Note : if your account already exist on amazon for shopping then you can use it here :)_
Second Go to console.aws.amazon.com
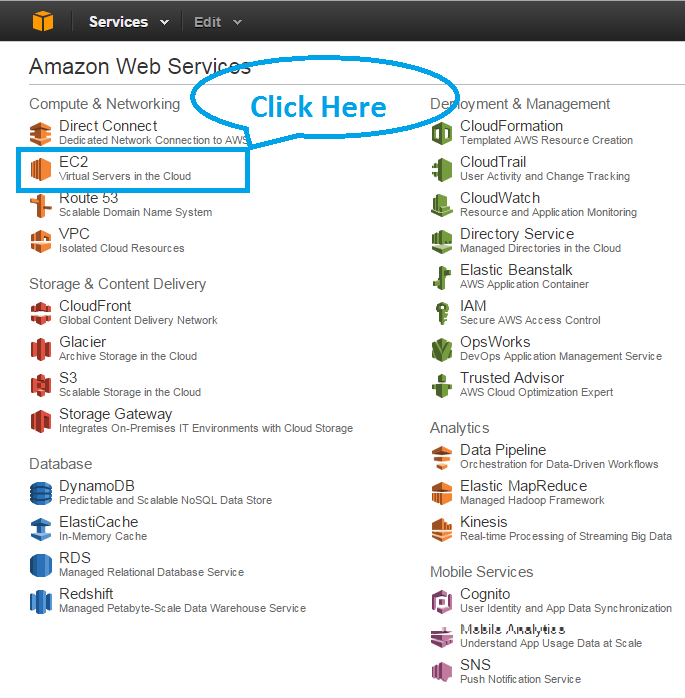
After Login when you come on this link then it will look like below then click on EC2 tab in this we will set our virtual server in the cloud.
Then After click on EC2 you will see below screen.In this click on Instances
 Then you will see below screen to Launch Instance
Choose An Amazon Machine Image (AMI)
Then after click on Launch Instance Button you will see below screen in this you need to choose Amazon machine Image (AMI). Basically in instance we do our all setup like in this tutorial we are setting Node.js then we will set all files and all configuration in this machine which is necessary to NOde.js Application as we do in local Systems. We can also do for Php, python, Ruby and many more.
_**In Short we set a computer in cloud in which our all configuration set**__**By the Amazon machine Image (AMI)**_
In this i have choose _Amazon Linux AMI 2014.09.1 (HVM) First option _with 64 bit due to some compatibility issues between the 32bit version and some versions of Node.
Choose an Instance Type
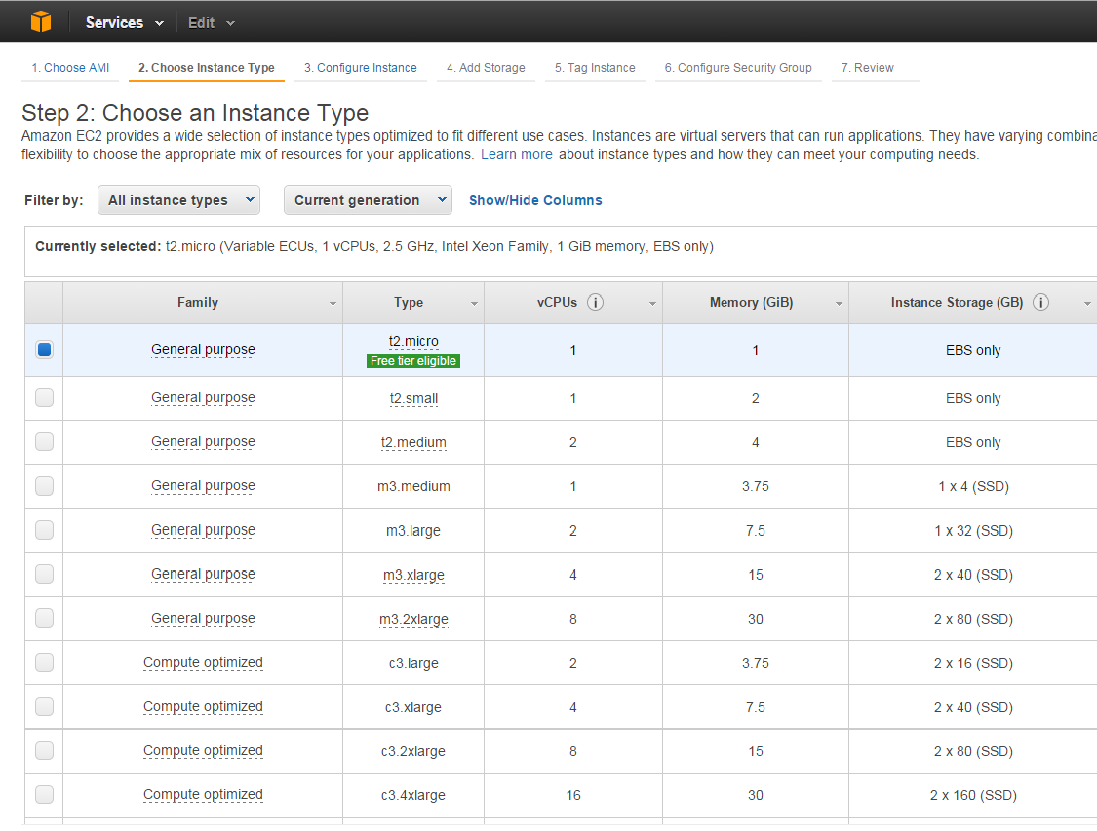
Then After Select AMI you will see next screen to choose Instance Type like below
In this you can choose any instance Type in this i have choose First and click on next to configure Instance. But you can choose any type as per your requirement here i am just showing that how i setup Node.js.Any Way come to the point Now next screen will look like below
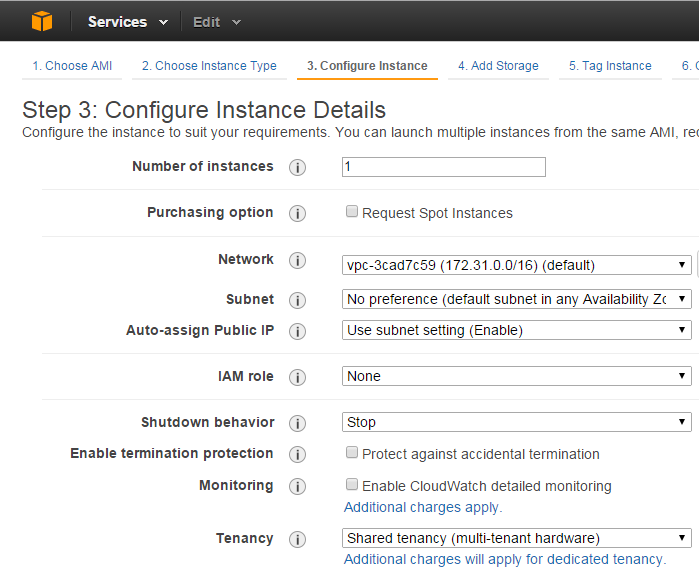
Configure Instance
In this i didn’t change any setting and click on next screen for Add Storage
Add Storage
The Add Storage screen look like below in this i didn’t change in any setting and click on next
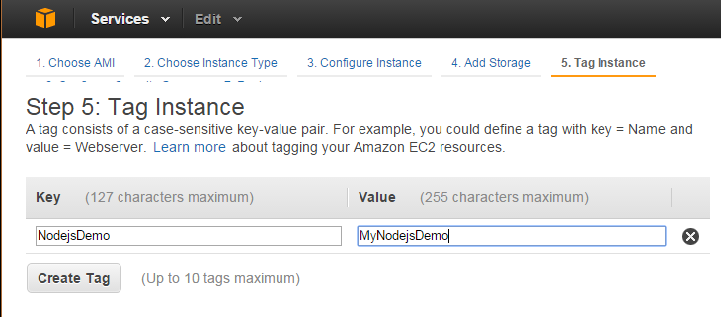
Tag Instance
In this Section we made key value pair For tagging .this is useful when we make more then 1 instance and we want to search by tag then it will helpful to search Instance . But this is not necessary to create tag but useful when more then one instance exist.
###
Configure Security Group
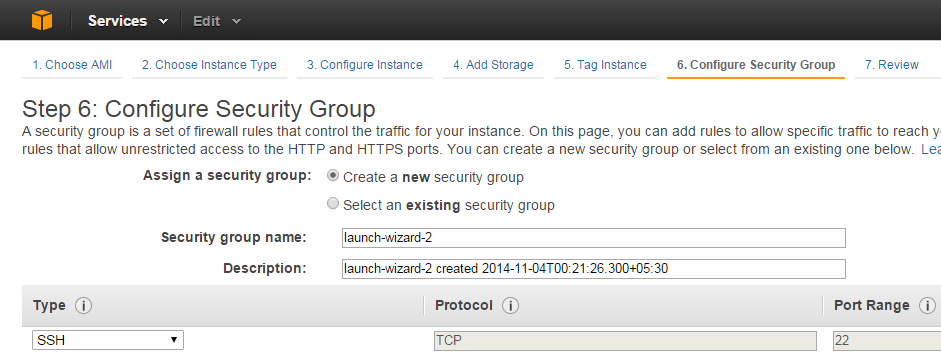
Now on next step we see below screen in this we select inbound tab to see which ports are open. By default only the SSH port (22) is open.
Now we enable HTTP port 80 **and HTTPS to **allow access from the web. and save all rules and apply then come to next screen which is review screen which we have all done in above with this steps.
Review and Launch Instance
Now in this screen our all details come then click on Launch button as shown in below screen
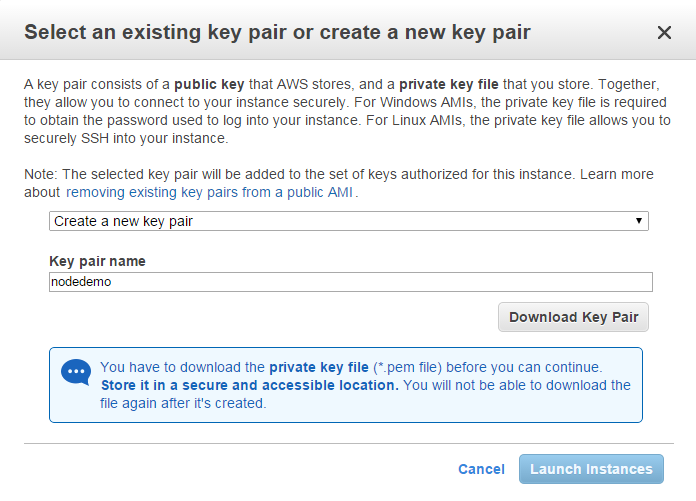
_**Note : When you click on Launch screen then at last step below screen come to set key value pair**_
This is use in AWS _to establish a trusted, authenticated connection between our computer(client side) and the server side during an SSH operation. So make key value pair like mention below screen you can choose any name for key value pair which you like Here i am giving name _nodedemo. then a file will download with .pem Extension with key pair name so here in my case file name will nodedemo.pem. after download this file please keep it safe because it will use when we do ssh connection with AWS EC2 and Now click on launch instance.
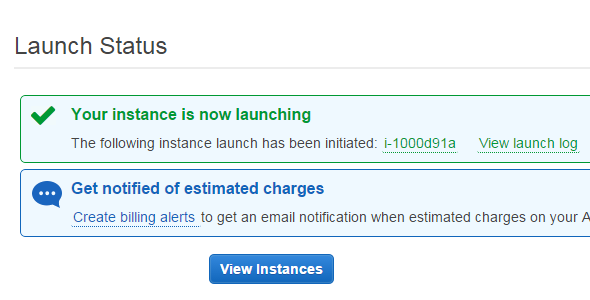
After click on Launch Instances below screen come . Congrats your instances is launch successfully .Now you will see below screen with the successful message then after this click on view instance button to see it .
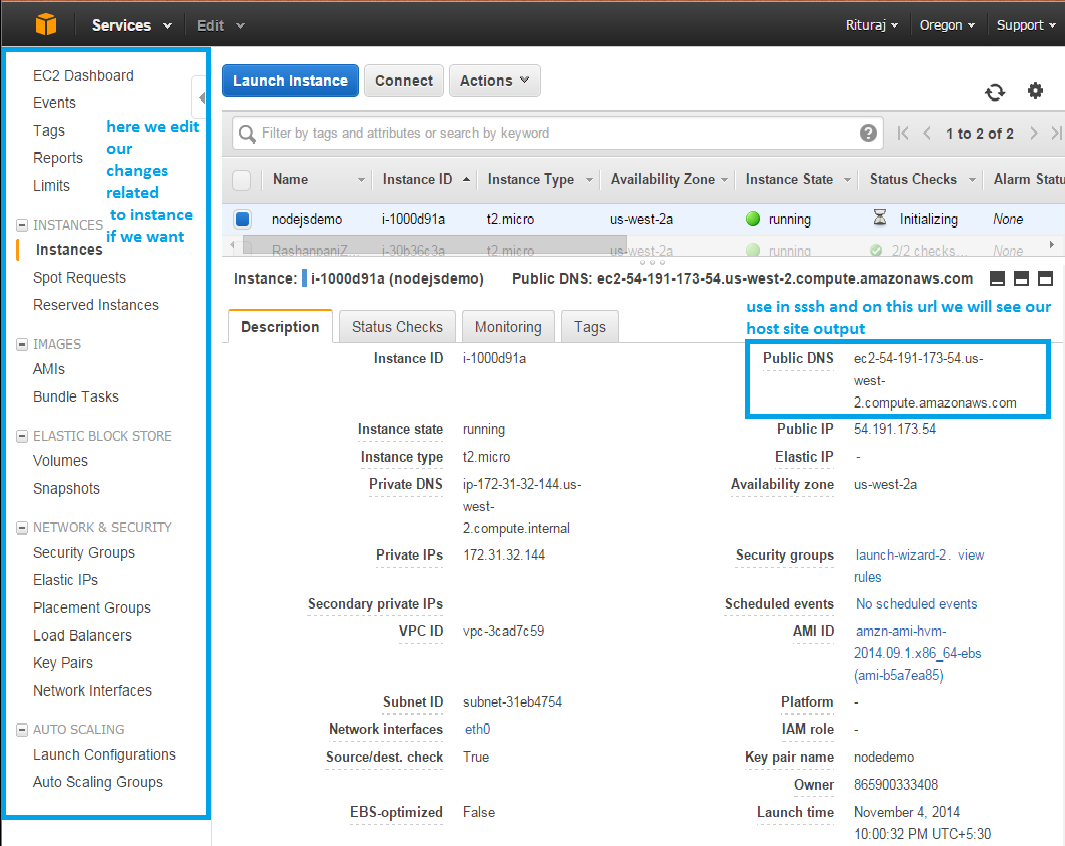
When we click on view instance then all instance list come which we can filter by their name and tag which we made above on _Tag Instance **section.we can edit our all setting by the left side menu as mention in below screen and in this screen we see Public DNS .**_Copy the public DNS value this is use when we do SSH into the machine.Amazon does not provide a username and password for ssh connections. Amazon use the key pair which we made above.
Connect to Amazon EC2 with SSH
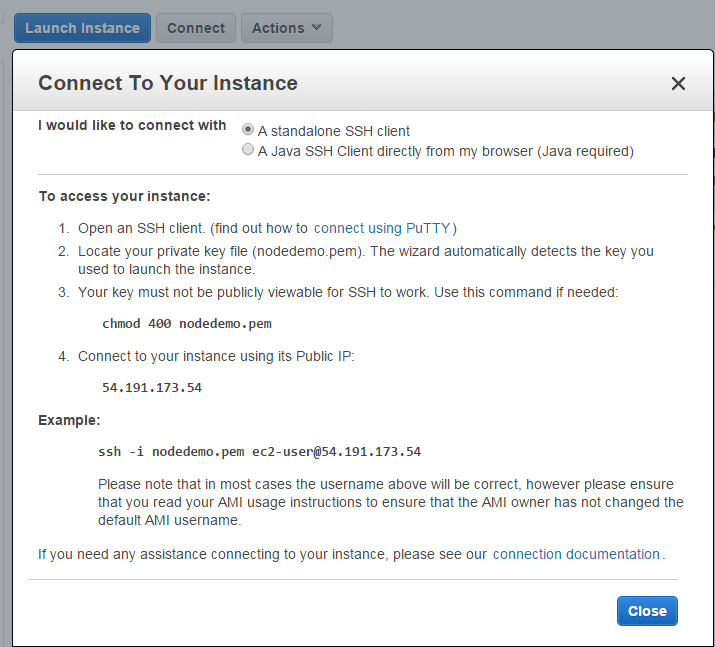
i am using Ubuntu so i am connecting with SSH. Window user can connect with Putty .In above screen shot you can see Connect button when you click on that you will see amazon provide all the details that how to connect to your instance. details will look like below
So open your terminal and type below command
ssh -i path of .pem extension file public DNS which you have copy
so in my case it will look like below
ssh -i nodedemo.pem ec2-user@54.191.173.54
After this command the SSH connection will be opened.Now we will be connected to the ec2-user’s home directory.Now we can do anything with our machine and install anything. In my Next post i will share you that how i install node.js and run it on server.
Please give your comment and suggestion.
Thanks…
